Our first tip, as expected, is focused on data collection. Not always easy to setup and understand, so our first tip is all about ensuring the basic Google Analytics tracking code is on your website. Details below!
To keep up with all 31 tips, visit the full list here, or join the newsletter for a weekly summary email, or follow us on your preferred social channel: LinkedIn, Facebook, Twitter, Instagram, Pinterest or subscribe to our channel on Youtube.
Why use Google Analytics?
It’s important to know what is or isn’t working on your website, and to better understand how your marketing activity is working in relation to driving leads, sales, downloads, signups, bookings etc.
Google Analytics collects data to help you understand those things. The sooner you get it up and running, the sooner you can gather that data and start planning your improvements.
How to install Google Analytics
Firstly, check and see if you already have it! Plenty business owners already have Analytics running … they just don’t know! Often it’s been setup by a developer or whoever built the website, and you’ve not specifically been given access to it.
Some initial steps:
- If you’re still in touch with the developers, ask them if they setup Google Analytics, and ask them for access. Remember, they might not have set it up, but worth asking.
- If you’re not still in touch with the developer, check back your emails and see if they’ve ever mentioned it. They might have sent details.
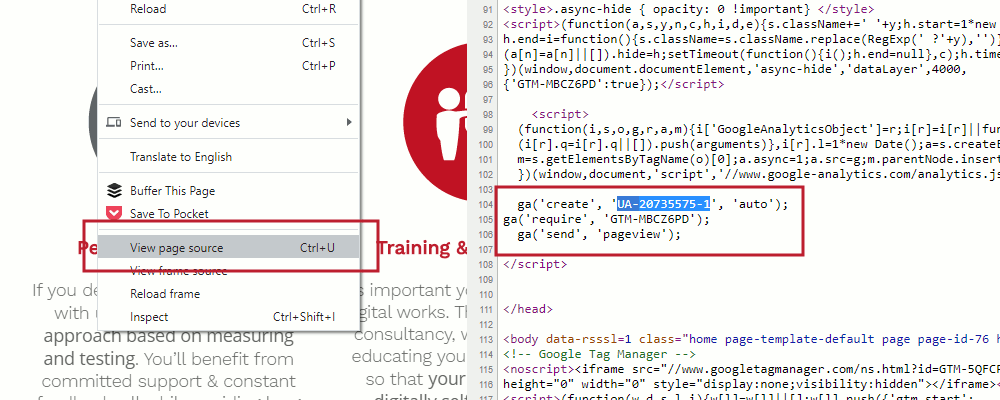
- The more techy approach … visit your website and right click the mouse. A popup menu appears and one of the options should be “View Source”. Click it. You’ll now see a lot of code. Fire up your browser search function. On Chrome it’s done by pressing “Ctrl + F”. Search for “UA-” and see if it finds anything resembling “UA-00000000-1”. If so, you do have Google Analytics setup. If not, see below!

If you know you definitely DO NOT have Google Analytics setup:
- Open up a Google account specifically to house some Google Tools (Analytics, Search Console, Google Ads etc).
- Log into that Google account and visit https://analytics.google.com/analytics/web/
- Follow the form setup process. It asks for company name, web address etc.
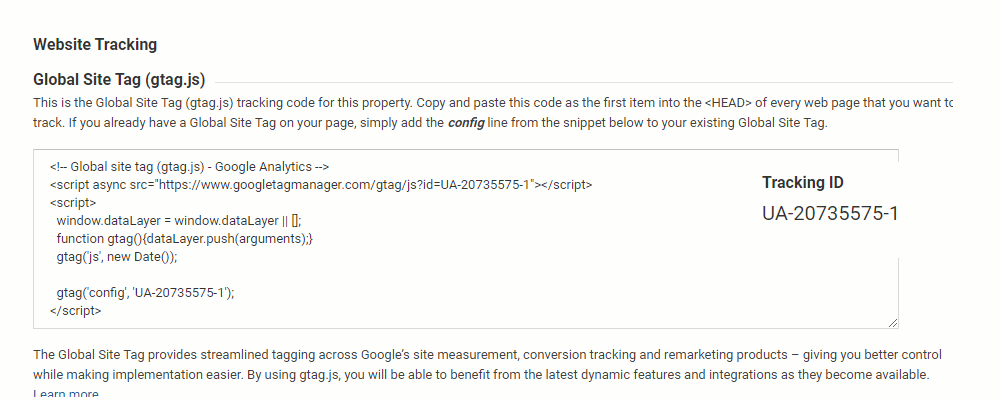
- You should end up on a page with a UA ID and a bit of code. This code snippet has to go on the website.

Adding Tracking code to your website
Adding the tracking code snippet or Tracking ID to the website can vary in difficulty depending on what platform you’ve used to build your website.
Some platforms (like Shopify, Squarespace, some WordPress plugins) simply require the UA ID Number to be added. Others require the whole snippet of code to be added.
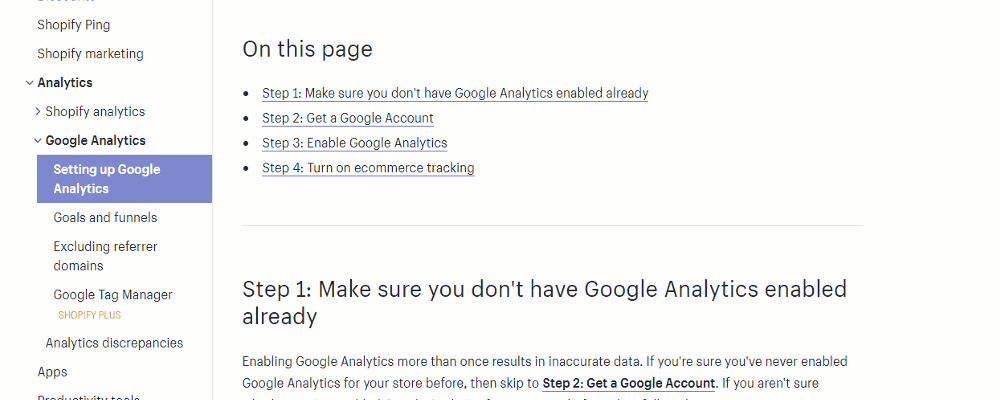
Our recommendation (if not in touch with your developer) is to visit the support section of your website platform (Shopify, WordPress etc) and search for “Google Analytics”. Most offer helpful guidelines on how to install the tracking code.

Once the code snippet is on the site, wait 24hrs and, if there are people looking at your website, Google Analytics should start reporting data!
There’s more to Google Analytics than adding a code snippet
We’re not expecting you to be an expert with Google Analytics from day one, but by setting it up now, it can at least start collecting data while you learn.
There’s more to Analytics setup than simply adding code to the website. You’ll need to explore other setup areas such as conversions, filters, ecommerce tracking etc … but at least with the basic adding to site, you’ll collect a ton of info about site performance.
Browse all 31 tips
To catch up on all 31 Digital Marketing Tips from this series, head over to the main blog post.


